With Dia de Los Muertos fast approaching, now is the perfect time to customize some clothing with a Stencil1 Sugar Skull stencil.

You’ll need some tools and supplies to get started:
- Stencil1 Sugar Skull stencil – Small (5.75″x6″)
- Jean vest (make sure it has been prewashed)
- Posca paint markers
- Low tac adhesive stencil spray
- Wax paper
- Iron.

Begin by flipping over your stencil and applying stencil spray.

Insert your wax paper behind the layer you will be painting on.

Center and place your stencil on the back of your vest.


Grab your white Posca marker and color in only the outer part of the image.


Now remove your stencil and color in the skull head silhouette.


These images show a single coat vs. multiple coats. Recoating is recommended as this will be the base for your other colors. Allow paint to dry between coats.

Realign and place your stencil back on your vest. Color in the outline of your skull as well as any other part you want black.


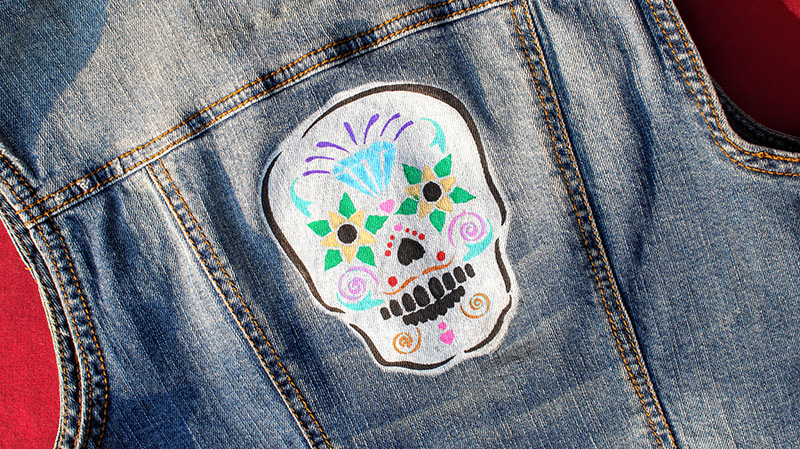
At this point, you can use your Poscas to color in the remainder of the stencil to your liking.


Remove the stencil, flip over the vest, and iron the back of your image, this will fully cure the paint so that it won’t come off in the wash.


You’re all done and ready to rock your cool new sugar skull vest thanks to your pals over at Stencil1.
This How-To was brought to you by ART one, a Los Angeles based Street Artist. You can see his art @art_o_n_e
Please share your version with us @Stencil1

