This past Friday was the start of the Chinese New Year. We celebrated at Stencil1 by making this gorgeous piece of art on hand made paper. We layered our stallion stencil over our scallop pattern stencil—part of our new Stencil1 stencil line with Plaid! This layering technique creates a beautifully intricate and festive look.

For this piece you’ll need: stencil brushes, scallop pattern stencil, stallion stencil, multi-surface paint and hand-made paper.

Step 1: To start, we mapped out where we wanted to stencil the pattern on the paper. We used hand-made paper because it went with our Chinese New Year theme. But you can make this on any surface—a shirt, pillow, canvas, cardboard etc! We decided to cover the paper with the scallop pattern fully except for a border around the edges.

Stencil1_YearofHorse_01

Step 2: Next, you can begin stenciling! Stencil using a dry brush technique, this means using very little paint and applying multiple layers. If you are stenciling on paper, you have to be extra careful not to use too much paint. Start extremely light and add on as needed. We used yellow, red and a metallic copper to get an umber look.  To do this, we used three different brushes to paint different sections of the design. Try to blend your colors and don’t be afraid to overlap.

Stencil1_YearofHorse_02

Step 3: Let that first section dry and move the pattern on to the next section. Use the part you already painted to align the stencil. Repeat this step until you’ve fully stenciled the paper.

Stencil1_YearofHorse_03

Stencil1_YearofHorse_04

Stencil1_YearofHorse_05

Stencil1_YearofHorse_06

Stencil1_YearofHorse_07

Step 4: Once your paint is dry, you can stencil the horse.  We used black because it resembles the black ink used in Chinese art.  Place the stallion stencil centered on the paper. And use a brush to paint it in. Remember to use very little paint. Use a circular motion to cover the larger areas and an up and down dabbing motion to cover the more detailed areas.  Apply as many layers as need to achieve the color you want.

Stencil1_YearofHorse_08

Stencil1_YearofHorse_09

Stencil1_YearofHorse_10

Stencil1_YearofHorse_11

Stencil1_YearofHorse_12

Step 5: Allow your paint to fully dry and then frame your art! Place it somewhere in your home or office and send us a picture of your work @stencil1

Stencil1_YearofHorse_13


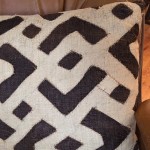
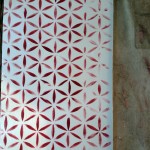
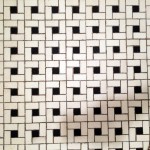
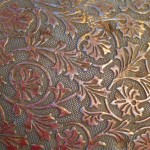
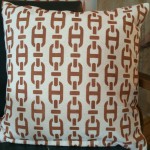
Here are 12 patterns in my home, they all play off each other in a fun way.


Whether you have a significant other or just love yourself, why not tote around the good vibes? This easy how-to will show you how easy it is to custom stencil a tote bag using our HEARTS 4-pack stencil, some multi-surface paint, and a stencil brush on a basic cotton tote.

Heart_tote_Stencil1_1

FIrst thing you want to do is insert a piece of cardboard into the tote. This way your paint won’t bleed through to the back of the bag and it will provide you a flat surface to stencil on.Heart_tote_Stencil1_2

Now place your stencil where you’d like your design to appear.

.Heart_tote_Stencil1_3

Time to whip our the fabric paint!

Heart_tote_Stencil1_4

Stenciling is a dry-brush technique.  Always remove excess paint from your brush before you paint in the design.

Heart_tote_Stencil1_5

I usually fill in my designs completely and evenly but I wanted these hearts to look airbrushed with a little dimension. The way you achieve this effect is by working from the edges inward in a swirling motion. As the brush gets less paint on it, you then lightly paint in the center.

Heart_tote_Stencil1_6

See 🙂

Heart_tote_Stencil1_7

Repeat the process. I switched colors but I did not wash my brush or my stencil as I wanted to blend colors. That’s up to you!

Heart_tote_Stencil1_8


And again!

Heart_tote_Stencil1_8b

I did this four times, sort of a motion to the hearts…

Heart_tote_Stencil1_9

Once the design dries, heat seal with an iron for 30-60 seconds per area.

Heart_tote_Stencil1_10

Tote your happy hearts around like my friend Libby did, spreading a little love in the NYC subway!

IMG_1898


For the January 2014 CHA show in Anaheim, California I debuted my new Stencil line with Plaid.  It was a fantastic show and it’s always fun and inspiring to walk the show and see all the innovative, new products coming out for the art industry.  I was very pleased to meet the guys at the Ironlak booth, a classic spray paint brand out of Australia. They introduced me to their new line – SUGAR. The name alone  got me. The packaging is on point as well – Bold, direct, and spells out all the selling points of this great new spray paint. LOWEST VOC’s in a spray paint. That means happy lungs! The formula is a harvested sugarcane alcohol based acrylic, not petroleum.  So as a stencil artist I love it because it dries super fast.  I visited the booth each day, watching their artists demo the product (yes indoors) and then arranged to get my hands on some cans for  video how-to’s posting to Ulive.com.

Here is a sneak peak at our vintage plate makeover using Stencil1 stencils and Sugar spray paint. Rat stencil soon to be released.  The paint sprays clean and evenly, like a perfect mist and I did the project in my studio (with the window opened). Amazing results.

We are the first to debut this paint and I can’t thank Ironlak enough for the opportunity.  SUGAR is yet to be released in the USA as of this post but as soon as it does, get your hands on it, it’s quality!

STAY TUNED for the full video!

Stencil1_Sugar1

Stencil1_Sugar2

Stencil1_Sugar3

Stencil1_Sugar5

Stencil1_Sugar4


With the release of my book Stencil Décor 101 in 2009, I had the privilege of working with Benjamin Moore.  Since then, I have used their paints for many of my installation jobs including the Ace Hotel and of course, at the Benjamin Moore headquarters.

In addition to naming a color of the year, Breathe of Fresh Air, The Benjamin Moore Color Trends for 2014 palette includes 23 carefully selected Benjamin Moore paint hues that harmonize with one another to create that perfect envelope for any interior design style. These are the 23 colors:

To highlight these highly usable and invigorating colors, we created a fun installation at the Benjamin Moore HQ under the direction of CMO David Melançon and Creative Director Ellen O’neill. Upon entry, you are greeted by a mural of dripping WET PAINT signs, each painted in one of the 2014 colors.  I loved doing this and was happy that Benjamin Moore, despite being a historic company, have a youthful vision.  As you continue down the hall, we painted large color swatches on the wall in the same colors. They not only help showcase the new colors, but they also function as modern art within the white (Dove White, to be exact) halls.

As a paint company, it seemed only right that we also hand stenciled multi layer Benjamin Moore logos in the main meeting room.   The Benjamin Moore team also requested we stencil a 6 foot ampersand on the wall to go along with their branding of the parent company being Benjamin Moore & Co.

You can read more about the colors and creative director, Ellen O’Neill, here.

BM 1

BM 2

BM 5

BM 9

BM 8

BM 7

BM 6

BM 3


Stencils are a great way to customize your favorite objects and make them look unique and interesting. We had a lot of fun personalizing our guitar case and giving it more of a punk-rock look. The possibilities are endless when customizing! Show us how much fun you have customizing by sending us your pictures @Stencil1.

This is what you’ll need: London stencil set, stencil brushes, multi-surface paint and tape.

Step 1: We chose a British theme for our punk-rock look so we are using the London stencil set, which is part of our new Stencil1 stencil line. First, we gave the case some texture by roughly painting the area we wanted to stencil white with paint and a brush.

IMG_3559

IMG_3560

IMG_3562

Step 2: Once the paint is dry—use a hair dryer to speed this up—you can begin stenciling! We started with the crown stencil. Remember to use a dry- brush technique. This means using very little paint and applying many layers. We weren’t going for a clean look, so we stenciled the crown roughly in a few areas. Use different colors and overlap your images for a more interesting design. You can use tape to secure the stencil or simply hold it in place with your hands.

IMG_3572

Step 3: Next we painted the silhouettes of the two-layer stencils. Once the paint dried, we stenciled the detail layers. Remember to use very little paint.

IMG_3569

Step 4: Lastly, we stenciled the British flag with the same rough look as the other stencils.

IMG_3567