Ornaments

Get into the holiday spirit with Stencil1 and Modern Surrealist‘s Marisa Pawelko! You may remember Marisa from her DIY Nautical Headboard and La Calavera T-Shirt she created using our stencils. She now returns with a new DIY to share with us using our Traditional Ornament Kit! Check out the full tutorial here!

The kit includes: 6 eco-friendly recycled wood composite holiday shaped ornaments, Stripes Repeat Pattern, String of Dots Repeat Pattern, Ornaments, and Star Rows stencils.

IMG_2574

Isn’t the final product amazing?! We love the way Marisa takes an extra step and always adds a 3-dimensional accent to our stencils. Thanks, Marisa!

We’re always looking forward to see what Marisa has in store for us. Check out her blog for more DIY’s and inspiration!

We want to see your DIY ornaments using our Traditional Ornament Kit! The Geometric Ornament Kit is also available for endless creative possibilities this holiday.

Snap a picture and share it with us @Stencil!


HANDMADE HOLIDAYS hop - HORIZONTAL

With the holidays just a few weeks away, check out this DIY bracelet we created for Clearsnap‘s Handmade Holidays!

Handmade Holidays is a blog hop consisting of some of the best companies and bloggers providing you their best handmade gifts online. Learn how to win a giveaway of over $600 in craft supplies from here at Stencil1 and many more companies to help make your holiday handmade at the end of this tutorial.

Let’s get started!

DSC01981

Things you will need: Plain wooden bangles, Clearsnap ColorBox Classic Pigment Ink, paintbrushes, and Stencil1 small Repeat Pattern stencils.

DSC01893

Step 1. Gather your materials. With the color of your choice, paint the wooden bracelet. This will be the base color of the bracelet. We chose the Color Box Classic Pigment Ink in Picante. Let it dry for a few minutes.

DSC01905

Step 2. Once the bracelet is dry, grab the stencil of your choice. Here, we used the Chevron Repeat Pattern, but you can use any of our small Repeat Pattern stencils. Place the stencil on the bracelet. Tip: Try using a low-tack spray adhesive to hold down the stencil around the bracelet.

DSC01917

Step 3. Paint inside the stencil using a dabbing motion. Here, we used the ColorBox Metallic Pigment Ink in Gold. Make sure to dab the excess paint on a napkin or plate to prevent any bleeding underneath the stencil.

DSC01930

Step 4. Carefully remove the stencil.  Let the ink dry for a few minutes before you continue to stencil. Reposition the stencil to a spot on the bracelet that hasn’t been painted and repeat.

DSC01931

Step 5. Let the bracelet dry completely.

DSC01939

And that’s it! The perfect handmade gift that is very easy to make and also, very fashionable. Top your gift off with a custom ornament gift tag using Stencil1’s Ornament Shapes! In this ornament gift tag, we used the Corsiva 2″ font stencil, and the Pine Branch stencil from our Holiday 4-Pack stencil set, which is now on sale!

DSC01971

Take a pic and share it with us @Stencil1!

Be sure to check out all the other contributors for this year’s Handmade Holidays Blog Hop for more inspiration and handmade gift ideas!

**Handmade Holidays Giveaway**

Handmade-Holidays-2015-Prize-Pack-1600-wide

We are having a giveaway of over $600 in craft supplies (Including our Geometric Ornament Kit!) to help you make this holiday handmade! Click HERE to enter.

#handmadeholidays2015

HANDMADE HOLIDAYS SPONSORS


1_ed

Ed Roth helped bring the heritage of Clarks original desert boot to life through custom shoes and stencils that generated buzz at retail.

– Nicole Spagnola, Integrated Market Manager of GQ

Hosted by GQ at the Clarks’ Soho location, and featuring the Stencil1 brand. Founder, Ed Roth, customized the original Clarks boots, intertwining street-art with Clarks’ craftsmanship. To see the process in completing the finish look, click on this link.

2

3

4

5

6

With five customized boots in the front of the store in display, Roth and his team also led a workshop for the guests. Using the stencils Ed Roth exclusively designed for Clarks, attendees were able to experience a DIY portion; painting pocket squares with Tulip Soft Fabric Paint.

102815_Stencil1_Clarks_GQ__MG_2418_original

Here are some pictures of our event with Clarks!

102815_Stencil1_Clarks_GQ__MG_2429_original 102815_Stencil1_Clarks_GQ__MG_2413_original 102815_Stencil1_Clarks_GQ__MG_2393_original 102815_Stencil1_Clarks_GQ__MG_2365_original 102815_Stencil1_Clarks_GQ__MG_2358_original 102815_Stencil1_Clarks_GQ__MG_2327_original 102815_Stencil1_Clarks_GQ__MG_2300_original 102815_Stencil1_Clarks_GQ__MG_2294_original 102815_Stencil1_Clarks_GQ__MG_2281_original 102815_Stencil1_Clarks_GQ__MG_2248_original 102815_Stencil1_Clarks_GQ__MG_2247_original 102815_Stencil1_Clarks_GQ__MG_2226_original 102815_Stencil1_Clarks_GQ__MG_2219_original 102815_Stencil1_Clarks_GQ__MG_2192_original 102815_Stencil1_Clarks_GQ__MG_2186_original 102815_Stencil1_Clarks_GQ__MG_2162_original 102815_Stencil1_Clarks_GQ__MG_2134_original


102815_Stencil1_Clarks_GQ__MG_2432_original

last

Check out our Facebook for more pictures from the event in the links below:

Link 1
Link 2
Link 3 

Hope to see you all at our next event!


4

Enter to win the Fall Antlered Deer giveaway from Stencil1!

Every week for the month of November, we will be giving out one Stencil1 Large Antlered Deer stencil.  A $29.99 value, for FREE! Perfect for your wall or any of your large-scaled DIY projects.

How-to Enter:

  1. Follow Stencil1 on either Facebook, Twitter, and/or Instagram.
  2. Share our post on any of your social media accounts.
  3. Tag @Stencil1 and hashtag #FallGiveaway.

Each account will count towards an additional chance to win, so be sure to follow us on all social media!

We will pick each winner randomly and announce the winner via social media every FRIDAY for the entire month of November.

Good luck, stencilers!

1

2

5

3


“The littlest thing makes a big difference,” according to GQ. Check out how we transformed this plain pocket square into a fashionable pocket square in honor of Clarks 65th anniversary of the original Desert Boot.

DSC01667

Things you will need: A plain pocket square, masking tape, brush and paint, and a Stencil1 stencil.

DSC01612

Step 1. Gather your materials. Place the stencil in your desired location on the pocket square. Here, we used a custom stencil we designed specially for Clarks. You can try using one of our Small Single Image stencils or Small Pattern stencils. Tip: Add some masking tape to the edges of the stencil to make sure it stays in place.

DSC01616

Step 2. Load up your brush with the color of your choice and start painting away! Make sure to dab excess paint off the brush in order to prevent any bleeding.

DSC01632

Step 3. Carefully remove the stencil off the pocket square. Move the stencil to another area of the pocket square and repeat!

DSC01644

DSC01655

Step 4. Once your pocket square is completely dry, fold it so it fits nicely into your pocket. (See tutorial below)

DSC01657

And that’s it! This little pocket square will add a huge fashion statement to your wardrobe.

DSC01663

Click here for a tutorial on how to fold a pocket square.
For more inspiration for your pocket square, check out The GQ Guide to Pocket Squares.

Take a picture and share it with us @Stencil1!


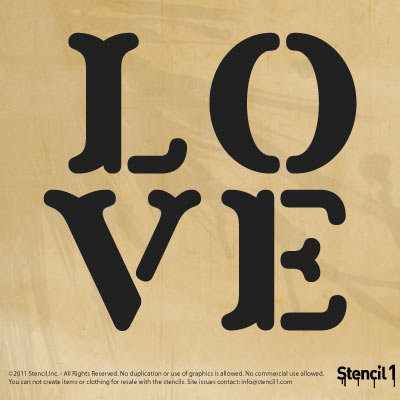
We would LOVE to see what you make with our LOVE stencil!

Download for FREE and create something and when you are ready to show the world your creation, please #Stencil1 and @Stencil1

LOVE_Stencil1


LOVE_from_Stencil1


Please note: This design is copyright protected and not for creating items for resale.