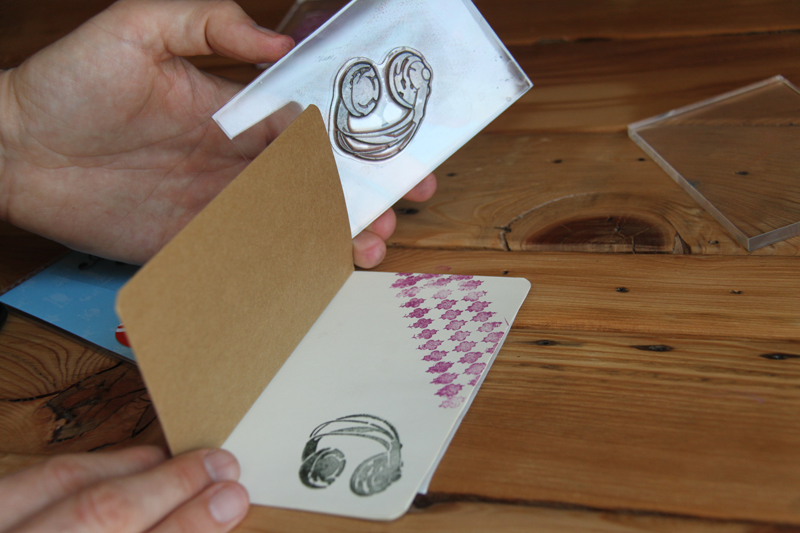
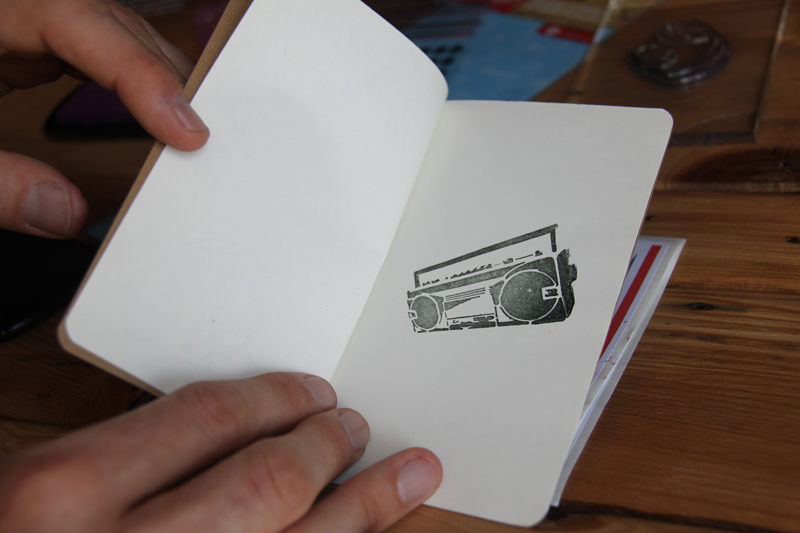
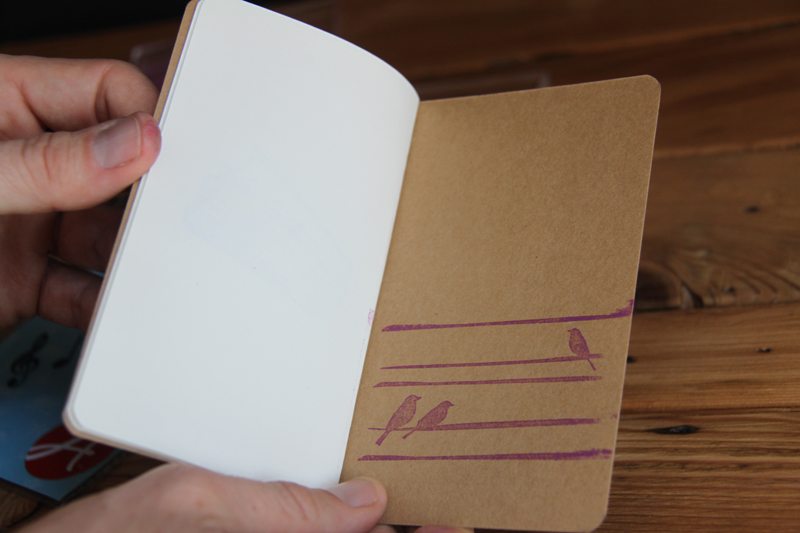
Something we do every morning at the Stencil1 Studio is make a list of the tasks that must get completed by the end of the day. Lists are a great way to keep yourself on track and be as productive as possible. Small Moleskine notebooks are great for making lists. They’re even better, and a lot more fun, if you customize them with your favorite images.

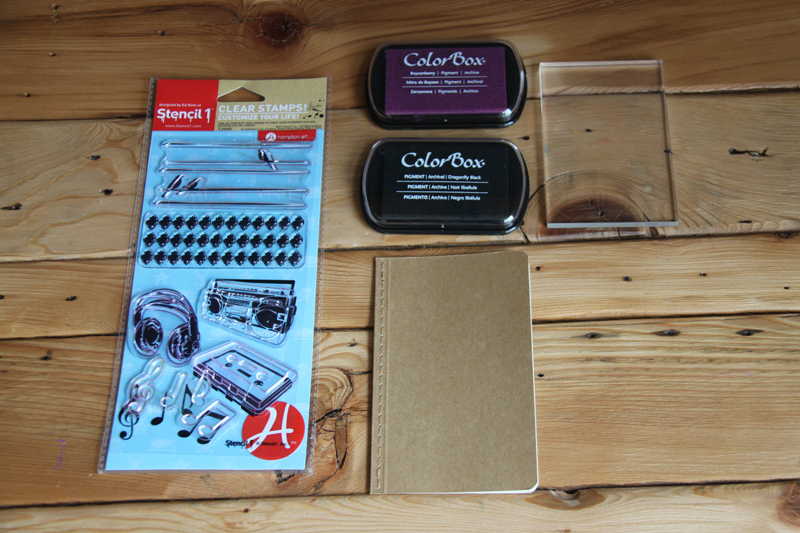
For this project, you’ll need: Quatrefoil Bird and Music Stamp SetClearsnap Pigment Ink PadsHampton Art Clear Blocks and a notebook with a paper-base cover.  The one used here is Moleskine, we love them!
IMG_3789

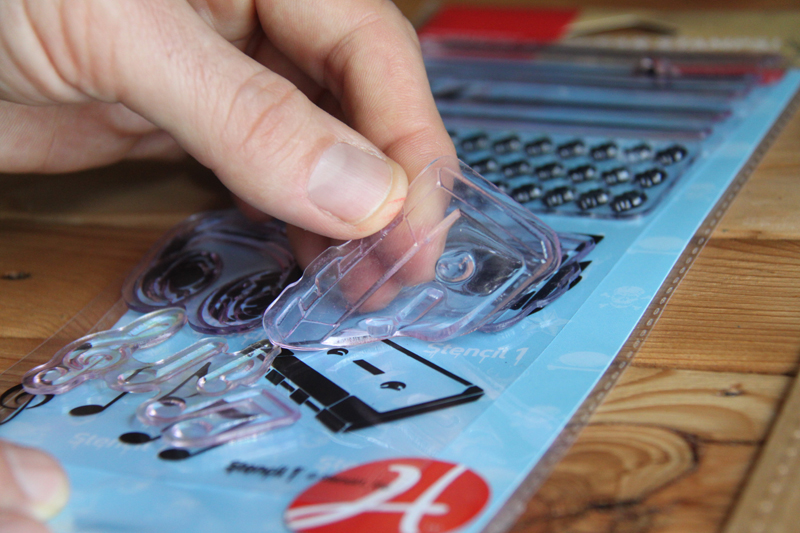
Step 1: Peel the cassette stamp off its backing and stick it onto the clear block.
IMG_3791

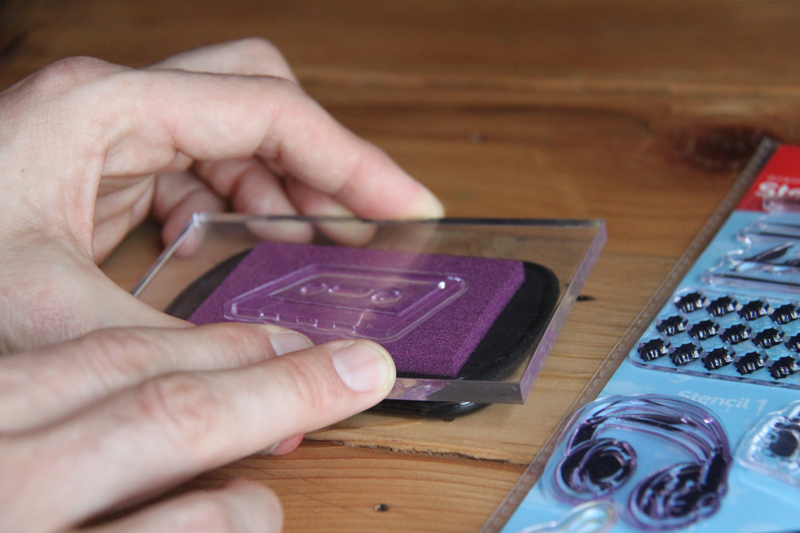
Step 2: Evenly coat the stamp with ink by pressing it face-down against the ink pad. Make sure to use even pressure.
IMG_3792

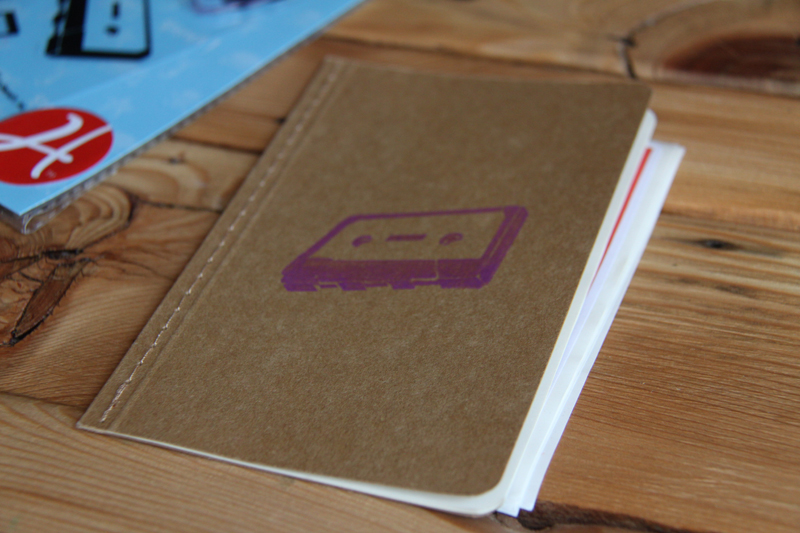
Step 3: Press the stamp against the cover of the notebook to apply the image. We chose the cassette as our cover but you can use any of the stamps or even combine them for an interesting cover! Repeat these steps with the other stamps to decorate the rest of the notebook.

IMG_3792

IMG_3795

IMG_3803

IMG_3807

IMG_3810

Show us what your notebooks look like @stencil1


This how-to was inspired by our love for Japanese textiles and indigo dyes. The deep blue color and the patterns on Japanese kimonos are a beautiful combination I am always drawn to. I also like the simplicity of circles or dots.

This is what you’ll need for this how-to: Stencil1 8-Pack Patterns stencil set, Stencil1 Asian Dots Stencil, Pebeo Setacolor paint or fabric paint, a pair of Converse sneakers, stencil brushes and low-tack spray adhesive.

Stencil1_dots_Converse_1

Step 1: Use the low-tack spray adhesive to secure the stencil. You don’t need too much of it, just enough to make the stencil sticky. Make sure that the room is well ventilated and that you are spraying near a widow.  Place the stencil on the corner of the shoe, near the heel.

Stencil1_dots_Converse_2

Stencil1_dots_Converse_3

Step 2: Pour some paint on a plate. You don’t need a lot of paint since you will be stenciling with a dry-brush technique. This means that your brush will have very little paint and that you will apply multiple layers.

Stencil1_dots_Converse_4

Step 3: Begin to stencil the shoe with the circle patter stencil by moving the brush in a circular motion and/or and up-and-down dabbing motion. Remember to use a dry brush technique.

Stencil1_dots_Converse_5

Stencil1_dots_Converse_6

Step 4: Stencil the other shoe. WE sort of stenciled in dots here and there to give a feeling of motion.

Stencil1_dots_Converse_7

Step 5: Use the Asian dots stencil to paint the tongue of the shoe.

Stencil1_dots_Converse_8

Stencil1_dots_Converse_9

Step 6: Put your shoes on, snap a pic and share them @Stencil1

Stencil1_dots_Converse_10

Stencil1_dots_Converse_11

Stencil1_dots_Converse_13


At Stencil1, we have a lot of fun experimenting with materials to stencil on. This week we tried our new Stencil1 Clear Stamps on wood ornaments. These ornaments can be used to give your tree a cool look or can also be used as labels and even gift tags!

For this project, you’ll need: Distressed Nautical Stamp SetClearsnap Pigment Ink PadsHampton Art Clear Blocks and wooden ornaments.

IMG_3762

Step 1: Peel off the stamp from its backing and stick it onto the clear block.

IMG_3763

Step 2: Evenly coat the stamp with ink by pressing it against the ink pad with even pressure.

IMG_3765

Step 3: Stamp the image onto the ornament by pressing it firmly against the surface. Play around with the colors you choose and the placement of your image to make more interesting designs. You can even try layering different stamps!

IMG_3767

Show us what your ornaments look like @Stencil1

IMG_3769


Our project this week was inspired by the excitement that came with the hand-written letters left in your mailbox. Remember the times when no one could email you, text you or facebook message you? We do! While it’s nice to have an easier way to get in touch with someone, a hand-written “I miss you” will always be extra special! Try personalizing your cards with our Stencil1 Stamps the next time you want to remind your special someone how much you think about them.

For this project, you’ll need: Bow + Arrow and Bullseye Stamp Set, Clearsnap Pigment Ink Pads, Hampton Art Clear Blocks and blank cards and envelopes.

IMG_3772

Step 1: Peel the Bullseye stamp off its backing and stick it onto the clear block.

IMG_3773

IMG_3774

Step 2: Evenly coat the rubber stamp with ink by pressing it face-down against the ink pad.

IMG_3776

Step 3: Stamp the image on the center of the card by firmly pressing it against the paper.

IMG_3779

IMG_3781

Step 4: Follow the same steps with the bow and arrow stamp and the envelope.

IMG_3783

IMG_3786

Show us what your cards look like @Stencil1


Everyone always says that homemade gifts are the best kind, and no one appreciates our homemade gifts more than our moms! Surprise your mom this Mother’s Day with this beautiful placemat that looks fantastic as part of a centerpiece.

This is what you’ll need: Stencil1  11 x 11 Mum stencil, multi-surface paint, stencil brushes and a placemat.

Step 1: We loved the color of this placemat so we chose a color palette that would accentuate it. Start by placing the mum stencil on the center of the placemat.

IMG_4214

Step 2: Use a stencil brush to begin stenciling the placemat. Remember to use a dry-brush technique. This means using very little paint and applying several layers.

IMG_4217

IMG_4219

IMG_4222

Step 3: Lift the stencil carefully and allow the paint to dry.

IMG_4228

Step 4: Continue stenciling the rest of the placemat but only fill in the stencil partly. We layered the stencil by overlapping it slightly at the bottom and we used a different color each time.

IMG_4230

IMG_4232

IMG_4234

Step 5: Repeat steps 3 and 4 until you finish stenciling the placemat.

IMG_4236

IMG_4237

IMG_4243

IMG_4248


Step 6: Allow the paint to dry and send us a picture of what yours looks like @Stencil1.

IMG_4301

IMG_4247


Stenciling on glass always looks stunning! It’s particularly exciting because the final product is slightly different each time. Try using our Stencil1 Mum stencil, part of our new stencil line with Plaid, to give your candleholder a new look.

This is what you’ll need for this how-to: a candleholder, multi-surface paint, Mum Stencil1 stencil, low-tack spray adhesive and stencil brushes

IMG_4253

Step 1:  Spray the adhesive on to the back of the stencil. You don’t have to use a lot of adhesive, just enough to secure the stencil to the glass so it doesn’t slip when you are painting.  Make sure your room is well ventilated and that you are by a window when spraying.

Step 2: Use the stencil brush to start stenciling the mum onto the glass. As always, use a dry brush technique (use very little paint and apply multiple coats). Stenciling on glass normally requires 3 to 4 coats, however we only did one coat so that you could see the candlelight through the paint.

IMG_4264

IMG_4265

Step 3: Lift the stencil and allow the paint to dry.

IMG_4266

IMG_4267

Step 4: Repeat steps 2 and 3 for each side of the candleholder, we used a different shade of green on each side.

IMG_4259

IMG_4261

IMG_4263

Step 5: Once the paint is dry, light a candle, snap a picture and share your candleholders with us @stencil1

IMG_4296

IMG_4294