Screen Shot 2014-06-05 at 2.52.54 PM

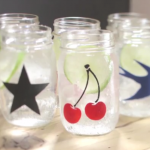
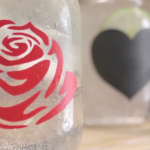
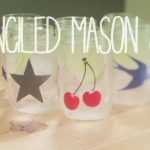
Stenciling glass is a lot of fun and makes a stunning product! However, it can be hard to get it just right, especially if you’re stenciling something that is not a flat surface. In this step-by-step video, I will show you how to stencil mason jars so that they always come out great!

Extra tip: If you have a low-tack spray adhesive, use it to make the back of the stencil sticky. This way, you won’t have to worry about holding down the stencil, making it a lot easier to stencil the glass.

Watch the video, try it at home and show us what you make! Remember to us a dry brush technique and to paint with an up and down motion!


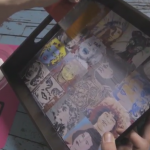
We’re really excited to share with you our 10 video series with Ulive! These step by step videos walk you through some of our favorite projects. From a beautiful shadow box to an awesome set of mason jars you are sure to find something you will have fun making!  Here are a few screen grabs of the videos, currently for view on Ulive.

Click through to view the videos and share your comments and/or picture of what you make!

Stencil Mason Jars

Stencil a Rad Cake With a Few Simple Ingredients

Stencil Dreamy Designs on Your Pillowcase

Build a Shadow Box Full of Your Memories

Simple Tricks to Stenciling a Repeating Pattern on a Wall


Decoupage a Tray With Your Favorite Photos

Stencil a Personalized T-Shirt and Impress Your Friends

Stencil Your Plates with Street Style Graffiti Art


I love Vans shoes because they’re a classic, cool brand that I grew up with. Their shoes are so comfortable and perfect for stenciling. I took one of my old favorite pairs and brought it back to life with a few of our pattern stencils.

Stencil1_Vans_01

Here’s what you’ll need for this how to: Colorbox Ink Pads for fabric , Stencil1 8 pack Pattern Stencil set, a pair of Vans shoes and low-tack spray adhesive.

Stencil1_Vans_02

Step 1: Put something inside your shoes to create a sturdy surface to stencil on. This makes it a lot easier to stencil. We used a bulky pair of socks.

Stencil1_Vans_03

Step 2: Spray the back of the stencil with a low-tack spray adhesive and attach it to the sneaker. This step is optional, but will keep the stencil secure making it easier to paint in the stencil. Dab a brush in the ink pad and push down in a circular motion to grab enough ink. These ink pads are a little softer than you might be used to, which makes it easier to pick up ink.

Stencil1_Vans_04

Step 3: Use a circular motion to stencil the shoe. Have fun using different color combinations. We used pink and orange for the top of our shoe. When you’re done, lift the stencil and allow the ink to dry. The ink dries in about 10-20 mins.

Stencil1_Vans_05

Stencil1_Vans_06

Stencil1_Vans_07

Step 4: Start stenciling the side of the stencil. We wanted to go for a playful look so we used different patterns each time we stenciled.

Stencil1_Vans_08

Stencil1_Vans_09

Step 5: Continue stenciling the rest of your shoe. Play with the layout of your stencils. Ours was not fully stenciled and we loved it!

Stencil1_Vans_10

Stencil1_Vans_11

Stencil1_Vans_12

Step 6: Snap a picture and share your revamped Vans with us @Stencil1


We love the way our Star pattern stencil looks on wood. It makes a great background because it is so textural!

For this how-to you’ll need: A wooden frame, Stencil1 Star pattern stencil (part of Stencil201 book!), painter’s tape, low-tack adhesive, multi-surface paint, and stencil brushes.

Step 1: Cover the edge of your frame with tape, this way you don’t accidently get paint on it.

Photo May 05, 12 10 59 PM

Step 2: Use the low-tack adhesive to make the back of your stencil sticky. This was especially helpful to us when stenciling because the stencil was a little bigger than our frame. Making it sticky made it easier to hold the stencil down.

Photo May 05, 12 12 32 PM

Step 3: Use a stencil brush and multi-surface paint to start stenciling. Use an up-and-down motion and a dry brush technique to stencil. This means using a small amount of paint and applying more layers. We chose a light color because we wanted a subtle design. But a bright color would also look great!

Photo May 05, 12 13 07 PM

Photo May 05, 12 16 30 PM

Photo May 05, 12 20 39 PM

Step 4: Lift the stencil and allow the paint to dry. Once the paint is dry to touch, continue stenciling the rest of the frame. We could not use the registration marks because they didn’t fit within our frame so we used the painted pattern as guidelines.

Photo May 05, 12 21 36 PM

Step 5: Repeat steps 3 and 4 until the frame is completely stenciled.

Photo May 05, 12 24 34 PM

Photo May 05, 12 29 49 PM

Photo May 05, 12 31 33 PM

Photo May 05, 12 56 13 PM

Photo May 05, 12 56 17 PM

Step 6: Remove the masking tape. We used our wooden frame as a tray, how will you use yours? Take a picture and share it with us @Stencil1.

Wooden_Frame