This how to comes from Marcela, a new Stencil1 team member!

Jewelry is an awesome way to accessorize, but all those necklaces, bracelets, rings and earrings can get messy pretty fast. In fact, my jewelry can get so crazy I constantly forget about the awesome pair of earrings buried in the growing pile of tangled jewelry. In an effort to give all of my jewelry some love and accessorize like a pro, I decided to make a rocking jewelry stand that not only looks great, but also helps me organize my jewelry and have easy access to all of it.

Start with a wooden stand (you can make this by using metal hinges, found at any hardware store, to attach two pieces of plywood or any wood you can find), brass hooks and tape.

jewelrystand_Stencil1_1

I wanted to go with a colorful, geometric theme that was easy to paint and avoided a mess. I used tape to make a design that wrapped around the entire stand. You can make a pattern similar to mine or challenge yourself a little more by throwing in some curvy lines here and there.

jewelrystand_Stencil1_2

jewelrystand_Stencil1_3

jewelrystand_Stencil1_4

Next, I began painting. You’ll need some paint and a couple brushes. A cup of water and a rag will help you keep your brushes clean. I used Folk Art paint and stuck to 6 colors.

jewelrystand_Stencil1_5

jewelrystand_Stencil1_6

jewelrystand_Stencil1_7

Depending on what paint you use and what look you want your stand to have, you might have to do a few coats. When you’re done, let the stand sit for 10-15 minutes or until the paint dries. You can use a blow dryer to speed up the process! Once the paint dries, carefully peel off all the tape.

Lastly, decide where you want your hooks to go. You can use a grid system, make a pattern or place them randomly. I decided to place my hooks at the corners of the shapes I made my design with. Keep in mind your jewelry when placing the hooks, put some higher up for long necklaces and some further down for earrings or rings. Tip: Use a nail and hammer to make a small hole where you are placing the hook to make screwing the hook in a lot easier! Once you’re done, pick a home for your awesome, new jewelry stand and organize away! Don’t forget to share pictures of what your jewelry stand looks like with @stencil1

jewelrystand_Stencil1_8_fin

Ps. Not that into jewelry? This would make a great and unique gift for anyone that is!!


So rather than watch tv last nite, I went to my studio for a few hours to make some prints. Earlier in the day I purchased some archival sheets of paper that are about 18″x24″, about $1.90 each.  If you want to make some art for your walls rather than stencil your walls, this is a fun project. To do prints like this, you will need stencils, ink sprays, a stencil brush, cardboard, and scrap paper.

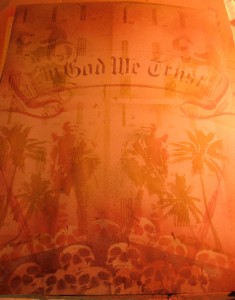
So I laid out a canvas tarp to catch any overspray and piece of cardboard to allow the paper to lay flat. I knew I would mostly be using my Stencil1 Sprays to make the print. These are fabric inks that are acid-free and archival. They are also non-aerosol! I had two very different concepts, one being a colorful explosion of stencils and the other more of an anti-war poster. What can I say, I’m a Gemini.

Stencil1 print

Archival print by Ed Roth of Stencil1

Archival Print by Stencil1

Archival print by Ed Roth of Stencil1

It’s a quick and easy process. I basically placed my stencils where I wanted them, masked out the areas outside the stencil so my overspray would paint my paper, I used scrap paper, and then sprayed lightly into the stencil area. When done with one stencil area, I carefully lifted the stencil up, still keeping it level with the surface so no excess paint on the stencil surface would drip onto my print. To get the excess paint off the stencil you can place a piece of paper on top of the stencil to soak up that excess paint, and in doing so you are also making a reverse print on that paper! That’s a tip from my gal pal Elaine.

As for the lettering in the banner in the war print, I did use a stencil brush and our Old English Stencil letters. What’s nice about doing lettering with the stencils is the mylar we use is semi transparent so you can see exactly where you want to align your type.

I proceeded to place stencils where I thought they would look nice, choose different colors, and continued this way. Creating your own composition is the fun part! Symmetrical or not, color choices, placement, it all comes from you.

So If you decide to make some poster prints using our stencils, please send us images and we wil post to the blog! Thanks!


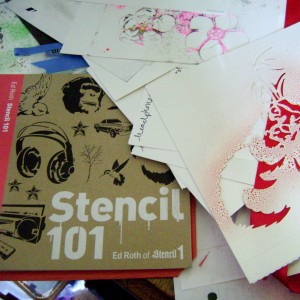
Stencil 101 Now Available!!

Hey there! I’ve been a busy little b..working on my first fifty giveaways for the Petaluma Craft Mafia Holiday Craftacular..and, of course, I had to use the deer from the new Stencil 101 book! The size  is perfect for tags and cards and papercrafty things.

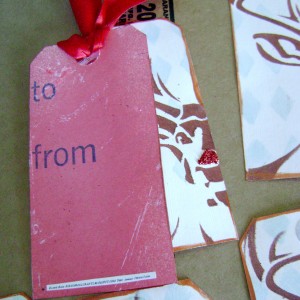
a little red glitter and the deer is a reindeer!

I just painted some manila tags white with acrylic paint, stenciled over the top with the deer in a burnt sienna color..and sprayed the back with the Red Stencil 1 Spray. It looks fantastic over acrylic paints..I’ll be back to post more Holiday ideas using the Stencil 101 images!!- Elaine


Obamathon, obama stuff..spoke cards, posters, t shirts..

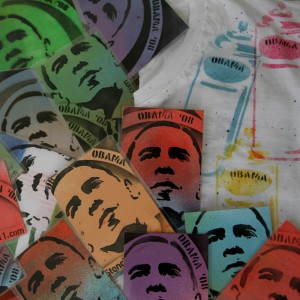
So I know it’s been pretty quiet here on the western front. I’ve been getting ready for a few upcoming events, including the Obamathon! Tomorrow in San Francisco, at the Verdi Club, I will be spraying Obama t shirts..only 5 bucks if you bring your own pre washed shirt! Plus I’ll have a few I’ve already sprayed..and some spokecards, posters and canvas bags! If you’re in the area, stop by and say hi! -elaine


taxidermy for the squeamish..

taxidermy for the squeamish..

Friday’s project! An influence of Andresen’s, a local drinking establishment that features a full taxidermie’d wall. I don’t know what it is about this particular stencil, but I love it. I use it a lot. This time, I just sprayed a copper background directly onto an unfinished wooden plaque. I added bits of tan and brown. Then I added the dots, from a found object screen, in red. When it was dry, I went back and stenciled the deer using black heavy body acrylic paint. I added a little bit of shading using a dry brush, pulling some of the black out. A little bit of dark brown on the edges, and picture hanger on the back and we’re ready to go!