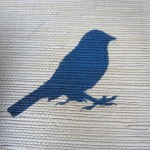
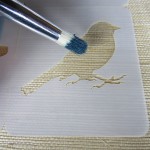
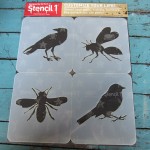
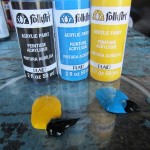
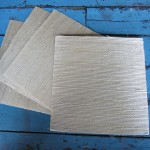
I love to paint on surfaces that already have wonderful texture and a beautiful finish. Grasscloth is one of those surfaces. It’s natural, beautiful, and affordable. I cut some small squares of the cloth and using a few folk art paint colors I love, I stenciled these birds and bees stencil designs. These could be framed and made into wall art or varnished and used as coasters.
howto
Are you ready? A guest post from my dear friend Elaine Elwick Barr!
Sometimes in the winter, I like to make comfort food. Something warm, familiar, delicious…but not all appetites can be fulfilled with food alone. Some need hands on, rock and roll crafting. And I had that hunger bad. I took a look at the variety and selection of Stencil1 stencils I own, including images from the first book, Stencil 101, the second book, Stencil 201, the home decor book, Stencil 101 Decor, and a whole host of the original mylar stencils. What could I make that could include alllll of these great images and maybe even keep me warm during this winter cold snap. QUILT!
Okay, I’ll admit I’ve stayed far away from quilt making in the past. Too much precision and too many rules, that’s what I thought. But I don’t care much for rules and perfection these days. I like what I make to look like I made it. So I went full steam ahead.

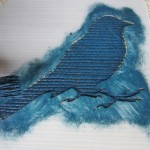
Since there are so many images to choose from, I took on a theme. This one is Stencil 1 Creatures..featuring some of my favorite birds, horses and the monkey in the middle. To make the quilt, you’ll need some fabric squares to stencil on, an old bed sheet, twice the size of your finished blanket, an old blanket or quilt batting, some Stencil 1 sprays, an iron and a sewing machine. I cut all of the squares, from coordinating fabric, and one by one, stenciled each, using Stencil 1 sprays. Each square gets heat set quickly with a warm iron.

Craft you later,
Elaine E. Barr
Blog; http://rocknrollcrafts.blogspot.com/
Etsy Shop: http://tinyurl.com/ebarresty

Looking for a way to liven up your bedding without having to go shopping? Look at what you can do with set of solid-color sheets and stencils from Stencil1. We used our Headphones stencil on the pillows cases and coupled it with the Graffiti Mini Set #1 on the flat sheet.
It’s the perfect weekend project for you, you and your sweetie, or the whole family.
The stencils are available individually at www.stencil1.com or some such as the headphones are one of 25 designs in our book Stencil101. Stencil Style 101 also has designs that are great for sprucing up apparel and home decor!
Here’s what you need and how to do it:
Materials: pillowcase, stencil, fabric paint, stencil brush, painter’s tape or spray adhesive, iron, cardboard or shirt box.
1. Choose your pillowcase: You can use a cotton standard bed pillowcase or a canvas throw pillow case for this project.
2. Prep the pillowcase: Insert a sheet of cardboard into the case to stretch the pillowcase flat and provide a flat surface to stencil on.
3. Position your stencil: You may wish to hold the stencil in place with a low tack spray adhesive or painters tape.
4. Begin painting: Using fabric paint and stencil brush, carefully paint in the stencil open areas using a pouncing motion. It’s best to use a non-toxic fabric paint rather than experimenting with spray paint or other paints given that you’ll be sleeping on it. Once completed, lift the stencil to see your design.
5. Finishing: Heat seal the painted design by using a hairdryer for 2 minutes then ironing the pillowcase inside out.

