A few months ago I paid tribute to  Mommie Dearest by creating a stencil of her at her most insane rant in the film, screaming ” NO WIRE HANGERS EVER!”  Well, how else to spread the fun times than to also have a sticker made of this icon.  StickerApp.com is the hero in this story. Their site makes it incredibly easy for you to upload and have a die cut sticker created and sent to you in a quickie!

They also have a library of designs you can choose from, seen here. And they offer custom printed skins and cases for your phone with a visual app to see how it would look, my leopard banana image shown here! Truly no one else would have the same case if I order this!

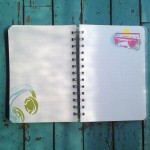
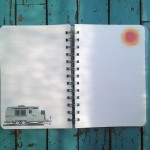
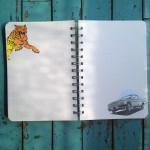
Well, I got to sticking my stickers and the first one I applied was to a Moleskine black journal. I carry these everywhere and like to customize the to distinguish it from others. I love, love, love Moleskine journals, a blank canvas to make your own. Some stickers then appeared outside, not sure how 🙂  Check out StickerApp.com and show us what you made!


I am a list maker, a dreamer, and always thinking of new things I want to make. For this, I like having a journal with me at all times. On the train, when I travel, or just lounging around.  The Stencil This journal was made to inspire people to stencil(using the cover and back which are plastic laser cut stencils) and to journal and draw on some hopefully inspiring pages. I choose some of my favorite stencil designs and Chronicle Books and I made them really come to life with some painterly treatments. You’ll see in these pictures I use the pages to plan videos, draw doodles of new designs, and test newly cut stencils such as this whale. I like how he works with the existing artwork becoming a quatrafoiled whale amongst spraypainted splats!  I slashed the price of the journal and you can get it HERE. ENJOY!


This project is the utmost in up-cycling. Using a discarded item to make a beautiful gift, I’m all about that! So, I went to the dog park the other morning with my best friend Larry, shown here obsessing on a tennis ball. There I found a discarded empty bottle of cheap brandy in the bushes and that is the bottle I will use to show you how to etch a design on to it. Don’t worry, I took it home in a bag and boiled it!

Wrapping a stencil around a bottle is not so easy and etching creme is thinner than paint so it seeps a lit under a stencil unless of course you are using these new adhesive silk-screen stencils by Martha Stewart. Yes, Martha and the people at Plaid have created yet again a fool-proof tool so you can be creative and not worry about messing up! These silkscreens are really easy to use and lots of tasteful designs to choose from.  Here’s what I did.

First, I peeled the silkscreen off of it’s backing and placed it where I wanted the design to appear on the bottle. The back is sticky, re-positionable, and reusable.

Here’s a better shot so you see it really is a screen. This helps control your paint or in this case etching cream.

Then with protective gloves on,  I brushed a generous amount of the cream onto the open areas of the stencil. Go in a few directions so you don’t see brush strokes.

After 15 minutes, I rinsed the bottle with the screen still attached in the sink.  I peeled the screen off at this time and washed the bottle, the brush, and the screen/stencil.

I dried off the bottle and that’s when you can really see your etched design!

To finish it off, I carved an old champagne cork for the top and tied some twine around the neck to give it a vintage look.

It was so gratifying, I went hunting for more glass bottles! Hope this inspires you and please show me what you make!


If something is stencil-related, my friends and family tend to point these things out to me. Well, my brother Joe emailed me a link to Vecco, asking me if I had heard of it. Vecco, an SC Johnson company, are the makers of a stencil and spray colorant used to customize rugs. Yes rugs, it’s pretty genius. Briefly, you spray the stencil designs on, if you like what you made you spray a sealant, if you don’t you vacuum up the design and try it again. And the stencils are an absorbant material, reducing dripping. Watch the video for details. Well, I liked the product so much I emailed them and they knew and loved Stencil1 as well. A relationship was born! We created a few fun videos together, posted below, and we created some limited edition custom Stencil1 kits with some of my favorite designs! In the videos you will see my houndstooth and antlered deer stencils being used, aka the Huntley Stagsworth Welcome Kit. We made some other kits as well, Drop the Beat for the music lover which has my cassette and headphones stencils in it and the Dia de los Marvelous Welcome Kit, which you can win! This kit has my sugar skull design and some skull silhouette shapes.  The kit comes with the two stencils, two color sprays, the color sealant, and a welcome sized rug (18″x30″).

So, what do you have to do to win? Start by commenting below on the blog post why you want the Dia de los Marvelous Welcome kit.  Next, here’s a link to my pin, just REPIN IT TO WIN IT. Make sure to comment below first! This contest ends March 21,2013.

Vecco video about me, I think my dog Larry steals my spotlight, right?

YouTube Preview Image

Video of how to create a repeat pattern on your rug:

YouTube Preview Image

Images below of kit contents, good luck!


Have you noticed it’s the year of breaking traditions? I see a trend in holiday crafts that break away from the norm – chevron pumpkins, succulent filled wreathes, and now eggs are up for some reinvention. As a stencil artist, I have thought of this for some time but wrapping a stencil around an egg, not so easy. UNTIL NOW! (say that in a radio announcer voice).  The folks at PLAID have these fantastic sticky rubbery stencils that can wrap around surfaces.  I was introduced to these stencils at the CHA when I ran some demos at the Plaid booth and my brain starting thinking of all the surfaces I dismissed for being to hard to stencil!  Cut to today, I was on Pinterest and saw some Easter Egg images and the stencils came to mind! So I broke out the stencils, adhered them to the eggs and used inkpads and a stencil brush to apply the designs. Who doesn’t love an Easter egg hunt and It would be fun to have the stenciled egg be the grand prize winner!

Oh and out of sheer boredom I sprayed my spray inks on one egg for a “graffiti egg” design! Let me see your reinvented egg designs!


Oui, it’s true. I love Paris. Design, Architecture, Art, Food, Style – Paris owns it. I took so many inspiring photos, some you’ll see below. I added in some street art images as well. Upon my return, I had to make a quintessential Paris stencil collection. The Paris pack is tres chic, featuring the Eiffel Tower, the L’arc de Triumphe, A Metro sign, and the lovely and mysterious Mona Lisa.  Tell me what you’d make with them!