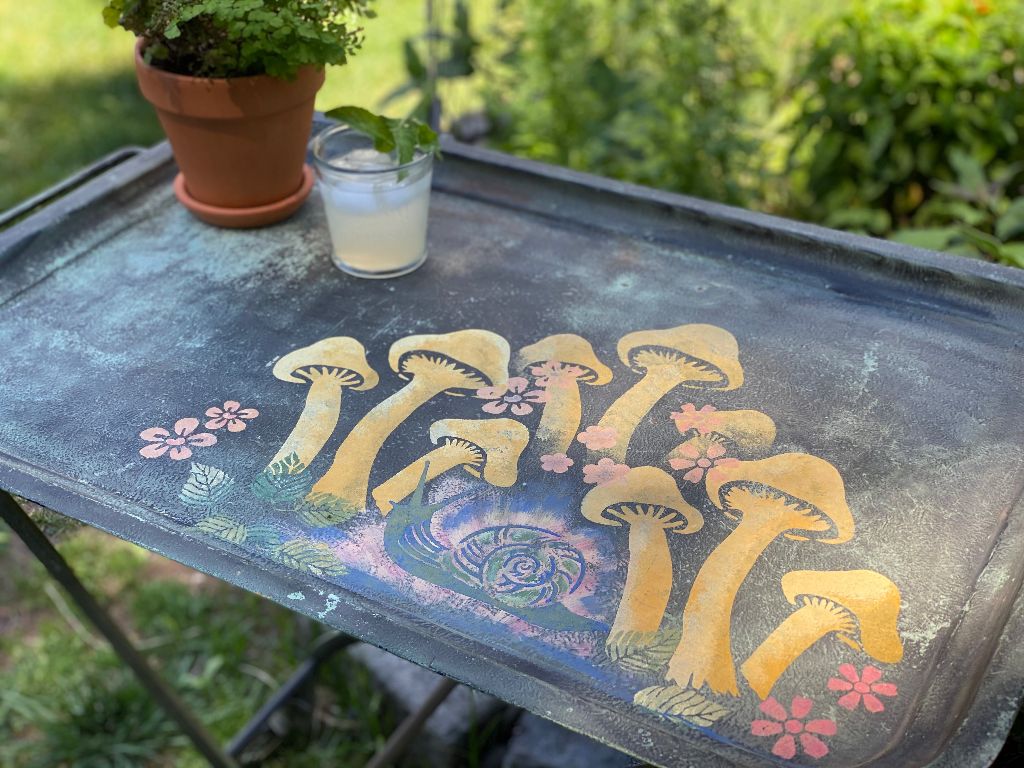
Here’s a DIY post that’s perfect for upcycling an old piece of furniture and giving it new life!This metal garden cart was actually someone’s trash and I decided to make it my treasure!Here’s how I stenciled the cart.
Materials you will need:
Metal cart
Assorted acrylic paints
Assorted stencil brushes
Mushroom stencil (8.5×11)
Spring stencil 4 pack
Snail and flowers stencil (8.5×11)
Matte clear coat spray

Color mixing and process
The process was really fun and easy. I wanted to keep the colors somewhat consistent with what you might find in nature. I mixed a golden yellow for the mushrooms and a lighter, brighter yellow to highlight them.

I chose to use the stencil three times at varying heights to create depth.

Then I mixed a bright blue for the snails first coat because the green I wanted to use would get lost against the green background without it. Then I went over that with the green, leaving some blue peeking through in spots to lift the snail off the background. I decided on a soft pink, with hints on orange and red for the flowers and used the green from the snail and a lighter yellow for highlights on the leaves.

I added metallic gold to everything I mixed up. After everything dried, I did two quick coats using a rust-proof, matte clear coat spray.

I loved doing this project, not only were the stencils adorable and fun but they also were easy to use on this surface. I love making something beautiful for my garden that I can use while spending time outside with friends.
Happy Crafting!
~ Teri @tjaneiro2 on Instagram
Do you create Home Decor Updates with Stencil1?
Please share with us on social @Stencil1 and #stencil1


