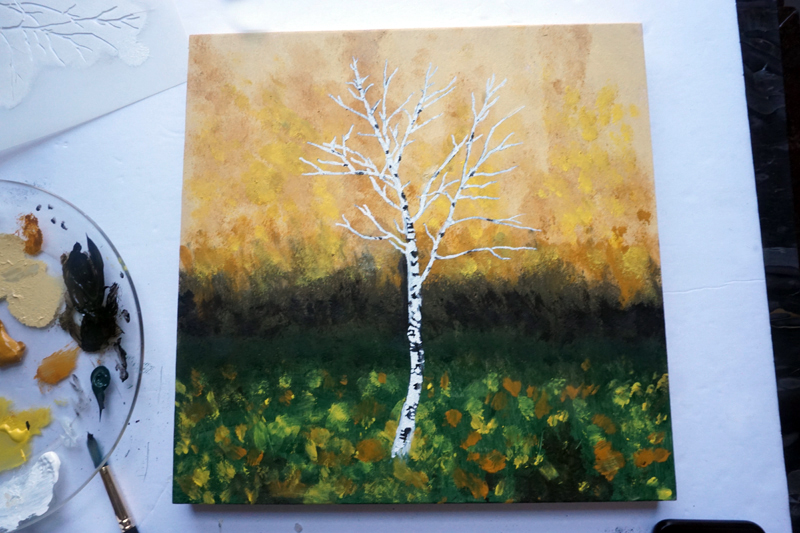
Birch trees, they are just so beautiful with their glowing bark! This how-to will show you some advanced techniques including painting a detailed background and ho to use a single layer stencil as if it were a two layer stencil. let’s begin!


These wood panels can be purchased at Target in their Handmade Modern collection. They make a beautiful canvas for art with a nature theme.
Our Birch Tree Stencil fits perfectly on these canvas panels.

Place your stencil on the canvas to imagine where it will appear. Then lift it off as we will first paint the backgroumd.

We used a few earthy colors for an Autumn feel. For inspiration you can search online for images of birch tree paintings as well.

Stiple in your colors.

Mix in the other colors in a sponge-like appearance.

To create perspective, add darker colors in the horizon line.

The foreground will have a brighter green ground on our painting.

I want all the leaves and ground to have a very varied texture, you don’t wan to see the same brush stroke over and over. Turn the brush in different directions as well as use your fingers if you want to get a unique stroke on the canvas.

We mixed in more colors to simulate fallen leaves.

Once the background is dry, it’s time to stencil the tree.

Here’s the trick. We want a white birch with black marking so first stencil in the tree in black or very dark brown or gray.

The tree is stenciled in dark but that is basically a guide for you to go in and paint in the details and bridges to create the under-layer of the tree.

I always say good tools are essential so use a very small detailed brush and fill in the bridges until your tree looks solid.

Once that is dry, you can wash and dry your stencil then place it over the tree design you painted to now stencil the details in white paint.

Stencil in the details using very little paint.

Now you have a very detailed birch tree!

You can add more birch trees or let this one stand proud! Please share your paintings with us at @stencil1


