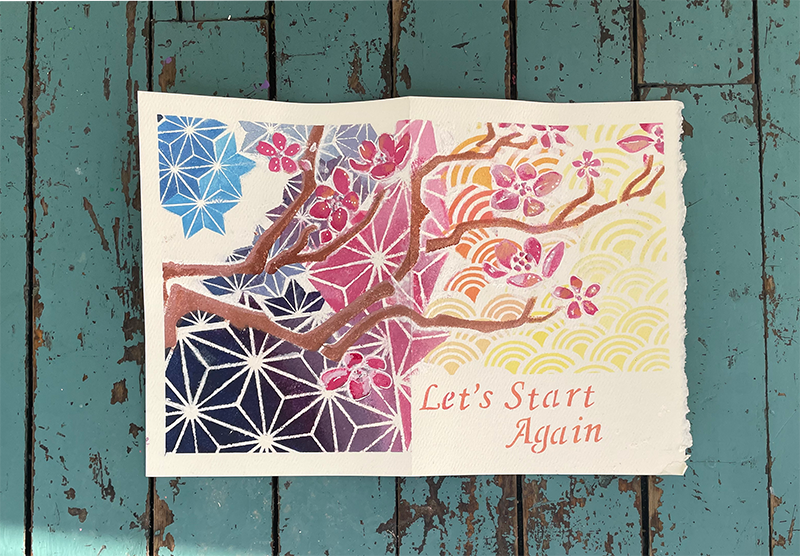
Hand-crafted greeting cards create a subtle charm, that can be felt on both sides of a sincere exchange.

Spring brings with it renewal, warmth, and creativity. As we welcome the positive and healing change, maybe we should thaw some of our frozen relationships. Surviving so many historical events, gives us an excuse to forget that humanity is the only thing linking us together.

Handcrafting a greeting card gives you so much more control, over what the message says. Sometimes, it’s hard finding an appropriate card, and commercialism can make one’s sincerity feel less meaningful. Hand-crafted greeting cards create a subtle charm, that can be felt on both sides of a sincere exchange!
So Let’s Begin!
Materials Needed:
- Acrylic Paints: Red Cadmium, White Titanium, Mars Black, Yellow Cadmium, Warm Blue Hue
- Stenciling Brushes
- A Craft Type of Paper in the size of a traditional card 4″x6″
- White Ink Pen for the cleanup
- Corsiva Stencil 8.5″x11″
- Asian Star Pattern Small Stencil 6″x6″
- Bullet Journal #2 – Patterns 6″x6″
- Cherry Blossom Stencil 8.5″ x 11″
- Sea Scallop Pattern Small Stencil 6″x6″

What to Use 
The Stencils
Once everything is gathered, get the masking/painter’s tape and create a small border around the card. We are going to create a vibrant cover and it will be oriented horizontally for the reader.

I put a little extra tape towards the bottom right because I wanted it blank in order to put some words.

To recreate the desired effect, we need to use the paint very sparingly. This project doesn’t use too much of anything. Just your imagination, and patience. I want to create a gradient effect from deep indigo, violet, into warmer tones. Using the Scallop Stencil I’ll use these to symbolize the sun. The Asian stars will be used for the other side with the cooler colors.

I only used acrylic paints in red, blue, yellow, and magenta. Magenta mixes beautifully with cool blue hues(Warm Blues tend to look slightly green/aquamarine.) We are not using black because it would desaturate the pure colors. Moving along to stencils! Once we’ve figured out the colors it’s time to begin using the stencils. Make sure to alternate the colors. Work from lightest to darkest as you move around your card.

The background looks good enough to me, I played with scale and color to make it visually interesting. Clean up any smudgy stencils with white paint/gesso/white ink. I used all three. The branch is next, so we lay it out and make a highlight layer with pure white. It helps make the colors pop.

Then create a warm brown with a combination of all three colors, I wanted my branch to appear reddish to match the Sakura petals. Went ahead and did the flowers, if you’re having trouble keeping the stencil still use more tape!


Do you create Mixed Media and paper crafts with Stencil1?
Please share with us on social @Stencil1 and #stencil1


 Valentine's Day